With the Photoshop, you don’t need a plane ticket, moving van, or magic portal to place your subject in a beautiful setting. Download the practice file above and follow the steps below to relocate our yogi to a more tranquil environment.

Clear your surroundings (and your mind)
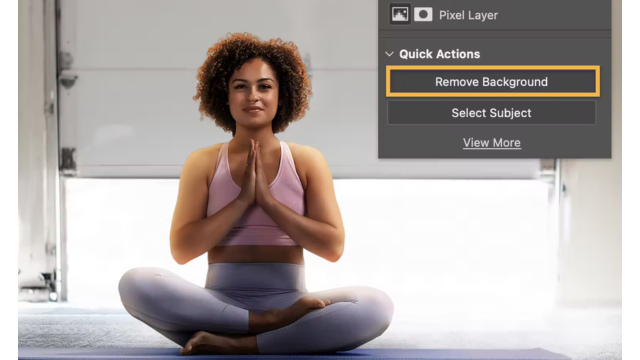
With the Garage layer selected in the Layers panel, open the Properties panel (Window > Properties), scroll to Quick Actions, and click Remove Background.
Find any missing pieces
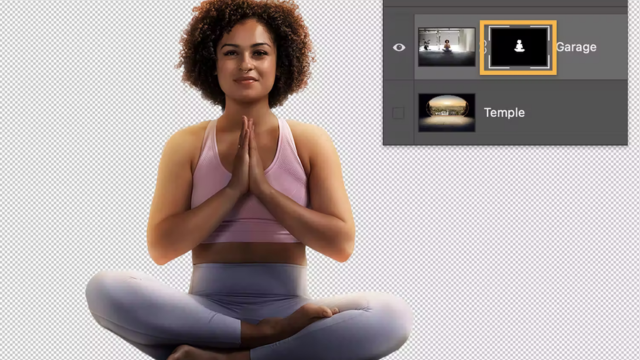
Photoshop created a mask to hide the background and show only our yogi. But it also hid her mat. Since we want her to be sitting on it in a new setting, let’s make the mat visible. In the Layers panel, click the layer mask thumbnail.
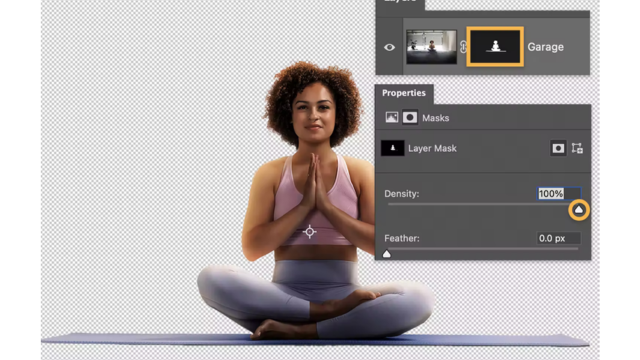
Get a better view
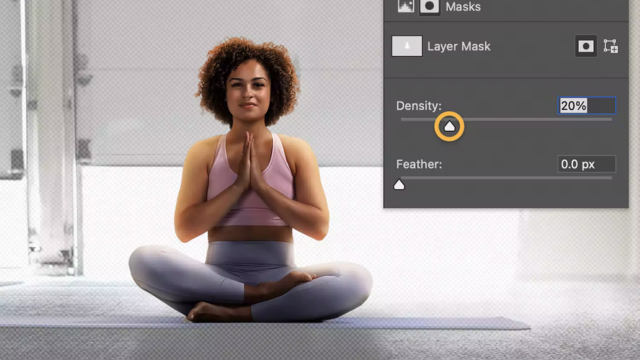
Remember, the background is still there, hidden by the mask. In the Properties panel, lower the density of the layer mask to make the background more visible and the mat easier to find.
Restore what was lost
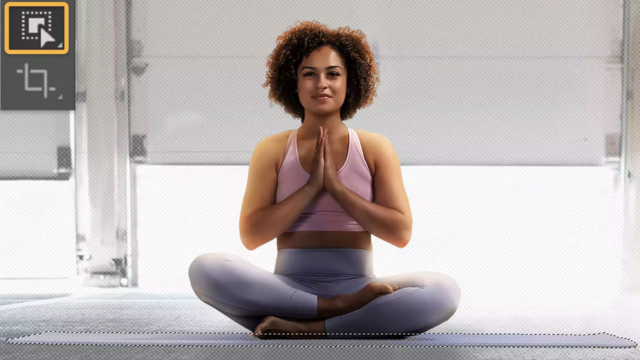
Choose the Object Selection tool and drag across the mat to select it. Now press Alt+Delete (Windows) or Option+Delete (macOS) to subtract the mat from the mask so it’s no longer hidden.
Take another look
Adjust the Density slider back to 100% to see that our yogi is now comfortably on her mat. Look closely at the layer mask thumbnail and you can see that the white area now includes the mat.
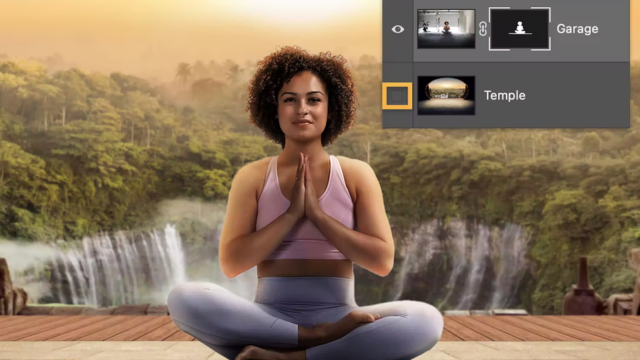
Surround yourself with beauty
Click the small box to the left of the Temple layer thumbnail to make that layer visible. Want to transport our yogi somewhere else? Drag your own photo onto the canvas and press Enter or Return. Then drag your new image layer underneath the Garage layer. And breathe.
To use your new image on social media, a printed flyer, or in other ways, choose File > Export > Export As and modify the settings for the output you need.
Contact us for free and detailed advice