Are you bored with simple font styles? Do you want something different, more creative to suit your new project? There are so many ways to get creative with fonts in Photoshop! With Photoshop, you can make your project more beautiful by replacing text with a photo that has a similar shape to the letter you want to replace.
Below Vietbay will introduce to you the steps to do this in the easiest way.
Step 1: Start with a statement
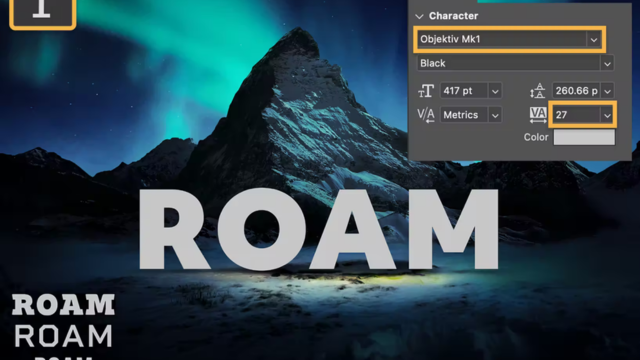
Choose the Type tool and type a word over the image. In the Properties panel, change the text size and color so you can see it against the background. Then mouseover the fonts in the Character drop down to find the style you like.
Step 2: Blend type and imagery
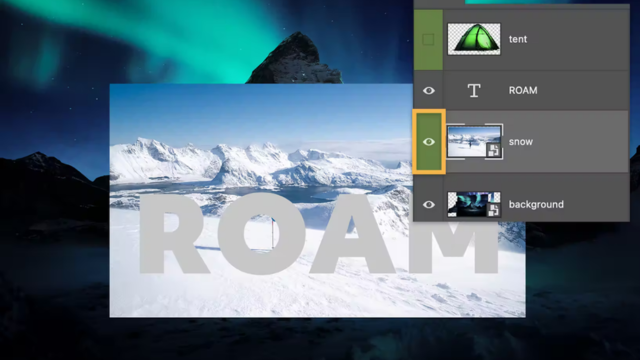
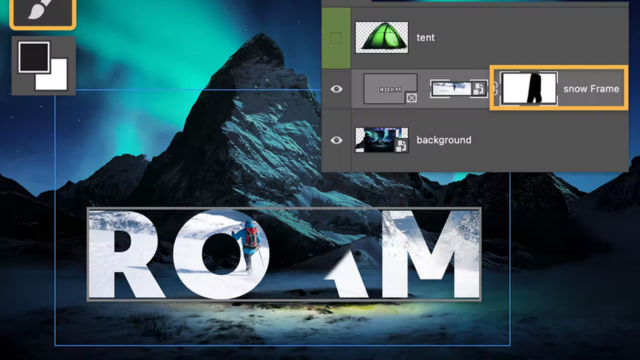
Click the small box on the snow layer to make it visible.
Step 3: Turn the text into a frame
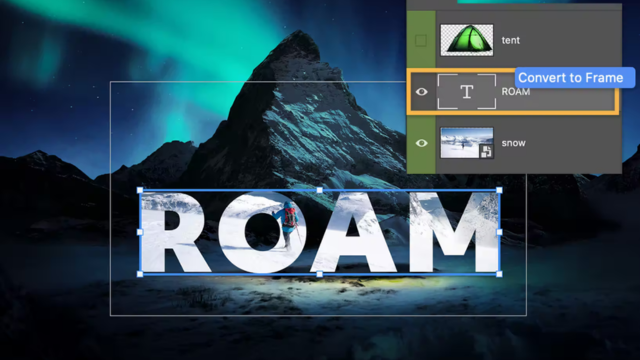
Right-click the new type layer and choose Convert to Frame to make the snow layer fill the text. You can also drag the snow layer into the text frame. Choose the Move tool and drag inside the text to reposition the image.
Step 4: Make a visual connection
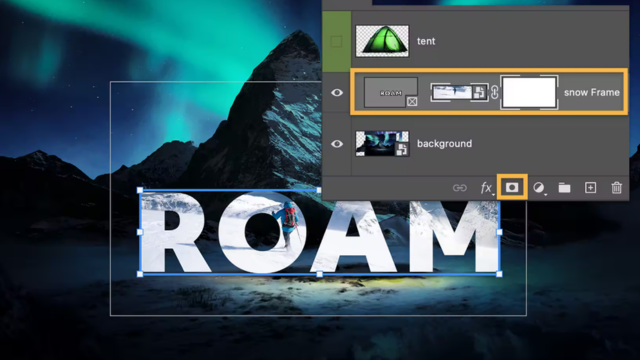
Let’s replace the A in the word with the tent from the layer above. First, select the type frame layer and click the Layer Mask button.
Step 5: Hide from view
With the layer mask thumbnail selected, choose the Brush tool and set it to black. Paint over the A to hide it.
Step 6: Turn it on
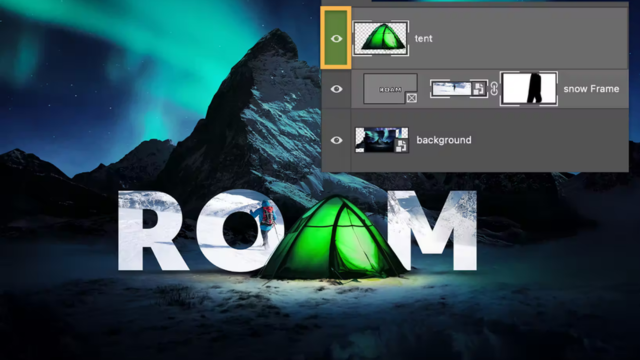
Make the tent layer visible so it represents the A inside the word. Use the Move tool and drag the word if you need to reposition it.
Source: https://creativecloud.adobe.com/
Contact us for free and detailed advice